Colorify wtf ?
Colorify is a script written in Javascript, that allows you to extract colors from images, and manipulates them. From a simple plain color, based on the dominant color, to a beautiful gradient based on the image edges colors, colorify.js will spice up your designs!
In summary, with Colorify.js, you can :
- - Extract the dominant color from an image
- - Generate gradients based on the images colors
- - Isolate colors and manipulates them everywhere in the page
- - Create a Lazy-revealer system for your images
- - Load image dynamically
- - Create any
colorify({});instances you want
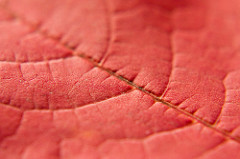
The script works with ANY images format : png, jpeg, jpg, gif
Documentation
- Installation
- Default config
- Load images dynamically
- Get main color
- Get Gradient
- Lazy-reveal
- Display on event
- Manipulates color
Installation
With Bower
$ bower install colorifyjsRegular install
To install colorify, just download the script and load it at the end of your page
 <script src="path/to/colorify.js"></script>
  </body>
And add the colorify.css to the head :
<link rel="stylesheet" href="colorify.css">Basic config
Keep in mind that you have to host the images on your server in order to avoid CORS restrictions
If your page contains only one section where you want to use colorify, you can use the basic config, to do so, you just need to load colorify like this :
colorify({});
Which is the equivalent to :
colorify({
    id: 1,
    attr: 'colorify',
    container: 'scene',
    images: false,
    accuracy: 100,
    gradient: false,
    gradientDirection: 'to bottom right',
    padding: 4,
    lazyReveal: {
      transition: 1,
      delay: 1,
      steps: false
    },
    giveTo: false,
    revealOn: false
  });
Load image dynamically
Sometimes you don't want to bother yourself writing too much code, you may want to load your images dynamically, there is a param for this in colorify.js, the images: parameter, you can pass an array of images to add them on your selected container
colorify({
    container: 'dynamic-images',
    images: [
      'path/to/image1.png',
      'path/to/image2.jpg',
      'path/to/image3.gif'
    ]
  });
Get main color
The main value of colorify is the ability to extract the average color of an image, to do so, call the function like this
colorify({
    container: 'colorify-main-color',
    accuracy: 10
  });
And for example you've got this markup
<div colorify-main-color>
    <img colorify src="image1.jpg">
    <img colorify src="image2.jpg">
    <img colorify src="image3.jpg">
  </div>
It will result in
<div colorify-main-color>
    <div class="image-container" style="padding: 4px; background-color: rgb(221, 89, 80);">
      <img colorify="" src="image1.jpg" class="colorify visible all-loaded" style="transition: all 1000ms ease 1000ms;">
    </div>
    <div class="image-container" style="padding: 4px; background-color: rgb(63, 147, 220);">
      <img colorify="" src="image2.jpg" class="colorify visible all-loaded" style="transition: all 1000ms ease 1000ms;">
      </div>
    <div class="image-container" style="padding: 4px; background-color: rgb(22, 196, 102);">
      <img colorify="" src="image3.jpg" class="colorify visible all-loaded" style="transition: all 1000ms ease 1000ms;">
    </div>
  </div>
Or visually, like this :

Get a gradient
To get a gradient from an image, you write the colorify script with the following parameters and values
colorify({
    container: 'colorify-gradient-color',
    accuracy: 10,
    gradient: true,
    gradientDirection: 'to bottom right'
  });
With the following markup
<div colorify-gradient-color>
    <img colorify src="image1.jpg">
    <img colorify src="image2.jpg">
    <img colorify src="image3.jpg">
  </div>
It will result in
<div colorify-gradient-color>
    <div class="image-container" style="padding: 4px; background-image: linear-gradient(to right bottom, rgb(233, 117, 104), rgb(224, 86, 77)); background-color: rgb(221, 89, 80);">
      <img src="image1.jpg" colorify="" class="colorify visible all-loaded" style="transition: all 1000ms ease 1000ms;">
    </div>
    <div class="image-container" style="padding: 4px; background-image: linear-gradient(to right bottom, rgb(61, 157, 220), rgb(75, 152, 222)); background-color: rgb(63, 147, 220);">
      <img src="image2.jpg" colorify="" class="colorify visible all-loaded" style="transition: all 1000ms ease 1000ms;">
    </div>
    <div class="image-container" style="padding: 4px; background-image: linear-gradient(to right bottom, rgb(29, 208, 118), rgb(22, 163, 75)); background-color: rgb(22, 196, 102);">
      <img src="image3.jpg" colorify="" class="colorify visible all-loaded" style="transition: all 1000ms ease 1000ms;">
    </div>
  </div>
Or visually, like this :
Lazy reveal
This is an interesting aspect of Colorify, and kindof the reason of it's existence. It will allow you to Lazy-reveal your images.
We use the term Lazy-reveal because it's not "lazy-loading" them per say. Because Colorify is a 100% client script, the only way colorify can process your images is when they are loaded and so, when they are loaded, the script hide them directly, process them and reveal them.
You can set the time you want, and it will reveal each images based on this time.
All at once without transition
To reveal the images all at once without any transition but a delay
colorify({
    container: 'colorify-lazy-reveal',
    lazyReveal: {
      delay: 3 // 3 second before revealing
    }
  });
Or visually, like this :
reload
All at once with transition
To reveal the images all at once but with a delay
colorify({
    container: 'colorify-lazy-reveal-2',
    lazyReveal: {
      transition: 2,  // The transition occurs for 2 seconds
      delay: 3
    }
  });
Or visually, like this :
reload
All at once with transition steps
To reveal the images all at once but with a delay and stepped
colorify({
    container: 'colorify-lazy-reveal-3',
    lazyReveal: {
      transition: 2,  // The transition occurs for 2 seconds
      delay: 1,
      steps: true
    }
  });
Or visually, like this :
reload
Display on event
You may want to display the image when a certain element is clicked ? from the body to an ID, you can display the images on any event, with any trigger !
colorify({
    container: 'colorify-reveal-on-event',
    revealOn: {
      event: 'mouseOver',
      trigger: '#hover'
    }
  });
Or visually, like this :
Hover me
Manipulates color
This is a cool aspect of Colorify, you can extract the color from a picture, and give it's value to any element on the page
The property parameter accepts :
background / background-colorcoloroutline-colorborder-colorfillbox-shadow
Give it to the parent
colorify({
    container: 'colorify-reveal-on-event',
    give: {
      property: 'background',
      target: 'parent'
    }
  });
Give it to children
colorify({
    container: 'colorify-reveal-on-event',
    give: {
      property: 'background',
      target: 'child'
    }
  });
Give it to the exact element
colorify({
    container: 'colorify-reveal-on-event',
    give: {
      property: 'background',
      target: '.cover'
    }
  });
API
Config
colorify({
  id: numeric,
  container: string,
  attr: string,
  images: array,
  accuracy: numeric,
  color: boolean,
  gradient: boolean,
  gradientDirection: string,
  padding: numeric,
  lazyReveal: {
   transition: numeric,
   delay: numeric,
   steps: boolean
  },
  give: {
    property: string,
    target: string
  },
  revealOn: {
    trigger: string
    event: string
  }
});
Example
colorify({
  id: 1,
  container: 'colorify-container',
  attr: 'colorify',
  images: [
    'image1.png',
    'image2.jpg',
    'image3.gif'
  ],
  accuracy: 20,
  color: false,
  gradient: true,
  gradientDirection: 'to top left',
  padding: 10,
  lazyReveal: {
   transition: 1,
   delay: 1,
   steps: true
  },
  give: {
    property: 'color',
    target: '.header h1'
  },
  revealOn: {
    trigger: '#start'
    event: 'click'
  }
});
default
colorify({
  id: 1,
  container: 'colorify',
  attr: 'colorify',
  images: false,
  accuracy: 100,
  color: boolean,
  gradient: false,
  gradientDirection: false,
  padding: 4,
  lazyReveal: false,
  give: false,
  revealOn: false
});
Parameters
id: The id of the colorify instancecontainer: The class or id of the containerattr: The attribute to use on the images to process, by default, the attribute is the same value ascontainerimages: Pass an array to it if you need to dynamically add imagesaccuracy: Each visited pixels, the more high the value is, faster the rendering will be.color: Set to true if you want colorify to give you the main color of the image, by default the value istruegradient: Set to true if you want colorify to return a gradient instead of a color, by default the value isfalsegradientDirection: If thegradientvalue is set to true, use this parameter to define de gradient directionpadding: If you want to have padding around your images and fake a colored border effect, give it a value or false, by default the value is4lazyReveal:transition: Set the time a transition should length, by default, the value is0delay: Define the time before the animation should start, by default, the value is0steps: Set to true if you want the images to reveal one after an other, by default the value isfalse
give:property: Define wich property should use the image extracted color, by default the value isfalsetarget: Give the selector class, id, name or attribute that should use the color with the definedproperty
revealOn:trigger: The selector class, id, name or attribute that should trigger the reveal, by default the value isfalseevent: The event to use to make the animation occur, of course theeventwill be attached to thetrigger